Saturday, May 22, 2010

Nikon Scan on 64-bit Windows (Vista, 7, 8, 10)


Last Updated 8/23/2015 (adds mention of Windows 8 & 10 support)

There are various instructions around the internet that describe how to get Nikon Scan working on a 64-bit system.  My instructions are slightly different and use only modified installation files from Nikon (nothing from Vuescan is used).  Before I list the instructions, this will only work with and has only been tested with the following devices and operating systems:
  • Devices
    • Nikon Coolscan IV ED
    • Nikon Coolscan V ED
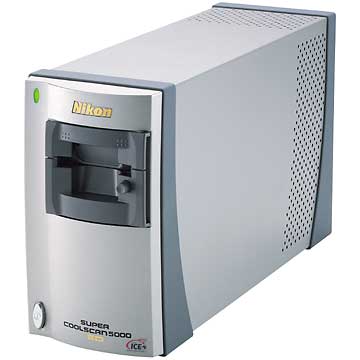
    • Nikon Super Coolscan 5000 ED
  • 64-bit versions of Windows Vista, Windows 7, Windows 8, and Windows 10
Here are the instructions to get this setup working:
  1. The driver included with Nikon Scan is an older 'unsigned' driver. Newer versions of Windows will only allow you to install 'signed' drivers but there is an option to enable installation of 'unsigned' drivers. Before you can install the Nikon scanner driver as detailed in the next steps, you will need to look for instructions specific to your operating system version for how to enable installation of 'unsigned' drivers. After you have done this, proceed to the next step.
  2. Install Nikon Scan 4.0.3 Vista 32-bit software. This was the last version of Nikon Scan that Nikon released before they ended support for the software. Windows will probably want to reboot after this step.
  3. At this point the scanner will not work so you will have to update the driver for the scanner with a modified version of Nikon's Setup Information File (.INF file) that works on 64-bit systems.  Create the file 'NikonUSBScanner.inf' with the contents shown below and save it somewhere like C:\Temp\Nikon (or just download NikonUSBScanner.inf):

    ; NikonUSBScanner.INF -- Windows Still Image Setup File of
    ; Nikon USB Scanners for Windows Vista/7/8/10 64-bit
    ; Manufacturer: Original by Nikon, Modifications for 64-bit by Chris Rawlings

    [Version]
    Signature="$CHICAGO$"
    Class=Image
    ClassGUID={6bdd1fc6-810f-11d0-bec7-08002be2092f}
    Provider=%ProviderStr%
    DriverVer=08/22/2009,1.0

    ;[ControlFlags]
    ;ExcludeFromSelect=*

    [Manufacturer]
    %Mfg%=DeviceModels,ntamd64

    [DeviceModels.ntamd64]
    %DeviceDescLS0040%=USBScanner,USB\VID_04B0&PID_4000
    %DeviceDescLS0050%=USBScanner,USB\VID_04B0&PID_4001
    %DeviceDescLS5000%=USBScanner,USB\VID_04B0&PID_4002

    ;///// USBSCANInstallSection /////
    ;** Windows Vista/7/8/10 section **
    [USBScanner.ntamd64]
    Include=sti.inf
    Needs=STI.USBSection
    SubClass=StillImage
    DeviceType=1
    DeviceSubType=0x4000
    Capabilities=0
    AddReg=NKUSBSCN.AddReg
    CopyFiles=NKUSBSCN.CopyUSDFiles

    [USBScanner.ntamd64.Services]
    Include=sti.inf
    Needs=STI.USBSection.Services

    [NKUSBSCN.AddReg]
    HKR,,HardwareConfig,1,4
    HKR,,DevLoader,,*NTKERN
    HKR,,NTMPDriver,,usbscan.sys
    HKR,DeviceData,ICMProfile,1,0,0
    HKR,,USDClass,,"{07C71AC0-FA90-11d3-B409-00C04F87578E}"
    HKCR,CLSID\{07C71AC0-FA90-11d3-B409-00C04F87578E},,,"Nikon STI USD"
    HKCR,CLSID\{07C71AC0-FA90-11d3-B409-00C04F87578E}\InProcServer32,,,%11%\NKSCNUSD.dll
    HKCR,CLSID\{07C71AC0-FA90-11d3-B409-00C04F87578E}\InProcServer32,ThreadingModel,,"Both"

    [SourceDisksNames]
    1=%DiskName%,,

    [SourceDisksFiles]
    NKSCNUSD.dll=1

    [DestinationDirs]
    NKUSBSCN.CopyUSDFiles=11
    ;NKUSBSCN.CopyUSBFiles=10,system32\drivers

    [NKUSBSCN.CopyUSDFiles]
    NKSCNUSD.dll,,,32

    ;[NKUSBSCN.CopyUSBFiles]
    ;usbscan.sys,,,32

    [Strings]
    ProviderStr="rawc@live.com"
    Mfg="Chris Rawlings"
    DiskName="Nikon Scan 4 CD-ROM"
    DeviceDescLS0040="Nikon COOLSCAN IV ED"
    DeviceDescLS0050="Nikon COOLSCAN V ED"
    DeviceDescLS5000="Nikon SUPER COOLSCAN 5000 ED"

  4. In the same place you saved the custom INF file, you will also need the file 'NKScnUSD.dll'.  This file can be found in C:\Program Files (x86)\Common Files\Nikon\Driver\ScanUSB, so just copy if from there into C:\Temp\Nikon.  This file was installed to your system when you installed Nikon Scan 4.0.3.
  5. Install the modified driver files for your slide scanner:
    • Now that both installation files are in place in C:\Temp\Nikon, turn the scanner on and navigate to the device in the device manager (right click 'Computer' in the start menu or on the desktop --> Manage --> Device Manager). 
    • Right-click on the scanner device and choose 'Update Driver Software'.
    • Next, choose 'Browse my computer for driver software' and browse to C:\Temp\Nikon where you saved the driver installation files. 
    • Give Windows permission to install the driver and you should be all set to start scanning with Nikon Scan on your 64-bit Windows system.

Monday, December 7, 2009

Serial (COM, DB9) and Parallel (LPT, DB25) PCI Bracket


I recently upgraded my computer and realized I had a problem. I no longer had a way of connecting my PC Engines Alix-based router (serial port) or my HP LaserJet 5L (parallel port) to my computer.  Most motherboards do not have these ports built in on the backplane anymore, but some motherboards have headers for adding these ports through an add-on PCI bracket. If you are looking at Intel Core i7 motherboards, you can forget about your motherboard even including headers for these "legacy" connections.  My motherboard, the Asus M4A785TD-V EVO, luckily has the headers on the motherboard. I could have always purchased some usb-to-serial/parallel adapters but based on product reviews they aren't always 100% compatible with some products...plus they are more expensive.

While it is quite easy to find separate PCI brackets for serial and parallel connections, it can be difficult to find PCI brackets with both ports.  It is even harder to find reinforced PCI brackets that won't bend as easily as normal brackets.  After some searching around, here are some links to buying the one in the picture below (notice the bottom edge that shows a length of the bracket bent underneath to provide extra support/strength):


Also, just in case you need to order PCI brackets in bulk or have them custom made... :-P
http://www.keyelco.com/products/prod45.asp?SubCategoryID=26

Sunday, September 13, 2009

Asus P6T Deluxe v2 Network Problems With Linux

Asus P6T Deluxe v2
The Problem

Under certain conditions, the LAN controller (i.e. NIC) on an Asus P6T Deluxe v2 motherboard may start sending strange packets after the computer is shut down.  This constant stream of packets from the NIC may cause all traffic through your switch to halt.  The cause of the strange packets appears to be triggered by a bug in the 'sky2' network driver in Linux.  See the information below to learn more about what conditions trigger this behavior and possible workarounds that can be used until the bug is fixed.

NOTE: This problem does not apply to Windows users.

Background

I recently assembled a computer using the Asus P6T Deluxe v2 motherboard and ran into an issue with the dual gigabit LAN controllers built-in to the motherboard.  While I was at work last week, I remotely connected to my new system through SSH and then shut it down after I had retrieved some information I needed (I usually like to shut down my systems while I'm not at home just to conserve energy).  I was also connected to another sytstem at home and about fifteen minutes later, after shutting down the Asus P6T-based system, I lost all network connectivity to the systems on my home network.  Without going into too many details, I eventually found out that the LAN controllers on the P6T motherboard can sometimes go into a weird state (after the machine is shut down) where they repeatedly send packets that look like the following (output is from 'tcpdump'):

21:57:39.787385 00:26:18:46:34:67 > 01:80:c2:00:00:01, ethertype Unknown (0x8808), length 60:
        0x0000:  0001 ffff 0000 0000 0000 0000 0000 0000  ................
        0x0010:  0000 0000 0000 0000 0000 0000 0000 0000  ................
        0x0020:  0000 0000 0000 0000 0000 0000 0000       ..............

The P6T LAN controller sends about 50 of these packets per second and after a while this causes all network traffic going through my switch to cease.  As you might imagine, it is especially annoying if this happens while I am at work and no longer have a way of accessing any of my systems until I get home.

At the time I discovered this, I called Asus technical support to see if this was a known issue or if I could possibly have a faulty motherboard.  Calling them was a mistake.  All I got was a condescending tone from the other side of the line and a person telling me that it was impossible for the NIC to send packets while the system was shut down.  He wouldn't believe what I was telling him.  That conversation ended pretty quickly once I realized I wouldn't be getting any support from Asus on this issue.  Before I hung up though they did mention that someone with a Maximus II Formula motherboard had called in with a similar issue a week earlier.  I later found out that the Maximus motherboard uses the exact same LAN controller as the P6T motherboard, a Marvell 88E8056 chip.  I would suspect that any motherboard that uses this Marvell controller would experience the same network problems.

After the lack of support from Asus, I decided to dig into the issue myself and after a lot of testing I found out how to reproduce the problem 100% of the time.  Before I explain how to reproduce the behavior/bug, here is a summary of the hardware and software I have tested with:
  • Motherboard: Asus P6T Deluxe v2
    • Dual gigabit NICs using the Marvell 88E8056 chip.
    • Other motherboards using the Marvell LAN controller may also be affected.
  • Switch: Netgear GS108T Gigabit Switch
    • I'm not sure if network activity halts when other gigabit switches are used.
  • OS's: Express Gate (Splashtop Linux), Ubuntu 9.04, Ubuntu 9.10 (alpha)
Testing and Observations

The table below summarizes each of the scenarios I tested to narrow down the problem.  The first four columns in the table show the variables that were changed for each test:
  • OS / Distro - I tested on Windows, Express Gate (Splashtop), Ubuntu 9.04, and Ubuntu 9.10.
  • Kernel Version - I tested with the standard installed kernel on all distributions except Ubuntu 9.04 where I decided to test with a vanilla non-patched kernel from kernel.org in addition to the standard Ubuntu kernel.
  • Switch Port Configuration - I used a managed switch and performed tests where the switch port connected to the P6T NIC was configured for either 10, 100, or 1000 Mb/s (and it did make a difference as you'll see in the table).
  • WOL enabled before shutdown? - I recorded whether or not wake-on-lan was configured before the system was shut down (e.g on linux wake-on-lan can be turned on with a command similar to 'ethtool -s eth0 wol g').
 The last four columns record my observations:
  • Ethernet Link Reset During Shutdown? 
    • During some tests, the led link lights on the switch would indicate that the link was momentarily shut down and then reestablished at the time the system was powered down.
    • On other tests, the led link lights on the switch would indicate that the link was never reset during shutdown (as if the link was still operating in the same mode as it was when the system was turned on).
    • In other tests, power to the NIC was shut off and the link was never reestablished (as expected if WOL was not enabled).
  • Ethernet speed after shutdown - During the tests where the ethernet link to the switch was reset after the sytem was shut down, I recorded the speed of the reestablished ethernet link.
  • WOL works? - Shows whether or not wake-on-LAN worked after the system was shut down.  For some tests this column is not applicable because WOL was never enabled/configured.
  • Strange packet bug encountered? - Shows whether or not I was able to see the strange packet sending behavior.
    • NOTE: In cases where the packet sending bug was observed, I first had to send around eight broadcast packets on the network to trigger the problem where the P6T NIC started sending the strange packets.  I could send any type of broadcast packet.  For example, the problem could be triggered by sending either broadcast pings (e.g 'ping -b 192.168.1.255') or wake-on-LAN magic packets (they didn't have to be specifically directed to the P6T NIC MAC address).
    • NOTE: In each case where I encountered the packet sending bug, traffic immediately resumed through the switch after after unplugging the cable from the offending network port.

Evironment / Settings
Observations
 OS/Distro Kernel
Version

Switch Port
Configuration
(Mb/s)
WOL
enabled
before
shutdown?
Ethernet Link
Reset During
Shutdown?
Ethernet
speed after
shutdown
WOL
works?
Strange
packet bug
encountered?
Windows 7 RTM n/a 10 yes yes 10 yes no
Windows 7 RTM n/a 100 yes yes 10 yes no
Windows 7 RTM n/a 1000 yes yes 10 yes no
Express Gate Unknown 10 no no 10 n/a
(WOL not
enabled)
no
Express Gate Unknown 100 no no 100 n/a
(WOL not
enabled)
no
Express Gate Unknown 1000 no no 1000 n/a
(WOL not
enabled)
yes
Ubuntu 9.04 2.6.28,
2.6.31
10 yes yes 10 no no
Ubuntu 9.04 2.6.28,
2.6.31
100 yes yes 100 no no
Ubuntu 9.04 2.6.28,
2.6.31
1000 yes yes 100 no no
Ubuntu 9.04 2.6.28,
2.6.31
10 no no n/a
(NIC gets
powered
down)
n/a
(WOL not
enabled)
no
Ubuntu 9.04 2.6.28,
2.6.31
100 no no n/a
(NIC gets
powered
down)
n/a
(WOL not
enabled)
no
Ubuntu 9.04 2.6.28,
2.6.31
1000 no
no
n/a
(NIC gets
powered
down)
n/a
(WOL not
enabled)
no
Ubuntu 9.10 2.6.31 10 yes yes 10 no no
Ubuntu 9.10 2.6.31 100 yes yes 10 no no
Ubuntu 9.10 2.6.31 1000 yes yes 100 no no
Ubuntu 9.10 2.6.31 10 no no 10 n/a
(WOL not
enabled)
no
Ubuntu 9.10 2.6.31 100 no no 100 n/a
(WOL not
enabled)
no
Ubuntu 9.10 2.6.31 1000 no no 1000 n/a
(WOL not
enabled)
yes

A couple of things to note from the table:
  • On Windows, where WOL worked and the bug was never encountered, the ethernet link was always reestablished at 10 Mb/s when the system was shut down no matter what speed of the link was when the system was powered on.
    • On Linux, if WOL was enabled, the ethernet link would be reestablished at either 10 or 100 Mb/s when the sytem was shut down (depending on the speed of the link while the system was running).
  • On Linux, when WOL was not enabled and the system was affected by the bug, the ethernet link was never reset when the system was shut down and it remained operating at the same speed as when the system was running.  It was as if the NIC was still operating in the same mode as when the sytem was turned on instead of going into a special mode that listened for WOL packets.
Summary

The strange packet sending bug was encountered if all of the following conditions were met:
  • The system was powered down from one of the following distros
    • Ubuntu 9.10
    • Express Gate (i.e. Splashtop) Linux built-in on the motherboard
    • Status of other distros is unknown.  I suspect that this problem may not be kernel-version specific but due to a patch that some distros apply to the sky2 driver...but I am not certain.
  • A Gigabit switch was used AND the ethernet link between the switch and LAN controller was established at 1000 Mb/s before the system was shut down
  • The sky2 network driver was not configured for wake-on-lan before the system was shut down
Possible Workarounds:
  • Enable wake-on-lan before the system is shut down (wake-on-lan will not work, but at least the NIC won't start sending the strange packets)
  • Use a Linux distro or kernel that does not exhibit this problem
Anyhow, hopefully this helps somebody that has been experiencing the same network problems and wasn't sure why it was happening (I was worried for a little bit that it might be a faulty motherboard or a failing switch).  If this problem gets fixed in the sky2 driver on Linux, I'll update this post to reflect the status.

Friday, September 11, 2009

Wake-On-LAN With Windows 7 and Asus P6T Deluxe v2 Motherboard

Article Last Updated: 3/3/2010

These instructions describe the steps required to get wake-on-lan (WOL) working with an Asus P6T Deluxe v2 motherboard and Windows 7 RTM.  Even if you don't have this specific motherboard, the instructions should be sufficient for learning how to enable WOL on most Windows systems. Also, I'll assume that if you found these instructions you already know what WOL is so I'll skip the explanation.

NOTE: For Linux users, WOL isn't currently working with the NICs on this motherboard.  These NICs use the 'sky2' network driver which has apparently had a history of problems.  I've tested on Ubuntu 9.04 and 9.10 with both standard Ubuntu kernels and vanilla 2.6.31 kernels from kernel.org and WOL just doesn't work.  I've also found other issues with these 'sky2' driver on Linux and will make another blog post on that subject soon.

To get WOL working on the Asus P6T Deluxe v2 motherboard, you will need to perform the following steps:
  1. Enable wake-on-lan in the systems BIOS setup utility
  2. Install the most recent network driver available through Windows Update
  3. Make sure the network driver in Windows 7 is configured properly for wake-on-lan
Each of these steps is shown in greater detail below.  Also, in case it isn't clear, since WOL needs to be enabled through the operating system as well as through the BIOS it will only work after you power down from the OS that you enabled the settings in.  For example, if you have a dual boot system with both Linux and Windows (and have only enabled WOL settings through Windows), WOL will only work after the computer has been shut down from Windows.

BIOS Setup

Enter the BIOS setup before the system boots and go to the Power tab --> APM Configuration screen and make sure that Power On By PCIE Devices is enabled.

The NICs in this motherboard are connected through the PCI-Express bus so Power on by PCIE Devices is the only option you need to enable (i.e. Power On by PCI Devices is not needed).  For other systems, you may need to consult your computer or motherboard documentation for information on what settings you need to enable for wake-on-lan support.

Install Most Recent Network Drivers from Asus

Update (3/3/2010) - It is no longer necessary to download the network driver from the Asus website. The Marvell driver that is available through Windows Update provides the desired functionality, so just make sure Windows is up-to-date.

On Windows 7 RTM (i.e. the final retail version), the network drivers that are automatically added by the OS during installation do not work with wake-on-lan.  I had to install the latest drivers from the Asus download site (http://support.asus.com/download) before WOL started working.  In the future, Microsoft may provide a more up-to-date driver for these network cards but as of right now (9/11/2009) it is necessary to download the more recent driver from Asus.

Enable Wake-On-LAN in the Network Driver Settings

Open the driver configuration window for the NIC by opening the system Control Panel --> opening the Device Manager --> expanding Network adapters, then right-clicking on the Marvell Yukon Gigabit Ethernet Controller and selecting properties.  This will bring up the driver configuration window seen below. Go to the Advanced tab and make sure that Wake From Shutdown is set to On.


Also, make sure that Wake-Up Capabilities is set to Magic Packet (you don't need Magic Packet and Pattern Match unless you know what it is).


Next, go to the Power Management tab and make sure your settings match the following (they should all be enabled by default):

That is it.  You should now be able to power off your machine and wake it with your preferred WOL utility/software.