 |
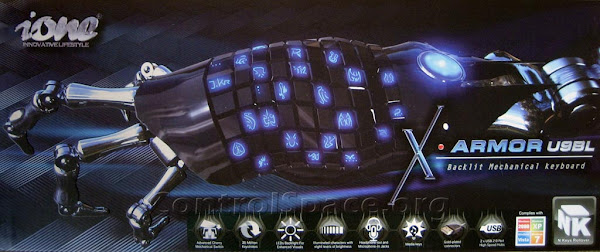
| Graphics On The Outer Packaging for the U9BL keyboard |
This is a review of the
XArmor U9BL mechanical switch keyboard. In the review, you'll find quite a few pictures (50+) and some of my impressions of this keyboard after using it for about 5 days. Unlike the typical review process, I'll also be sure to check back in at some point in the future to give my longer term impressions about the durability and quality of the product. The review provides a brief background of mechanical switch keyboards and what led me to this purchase, then proceeds to the the features, packaging, construction/quality, and my general impressions of the keyboard.
Update (1/27/2011) - As promised, here is my quick update on how the keyboard is holding up over time. After about six months of using this keyboard, I can say that I have been very happy with the keyboard. It has held up very well and there are no signs of wear with the rubber coating. I should note that the keyboard saw moderate to heavy use during its first 2-3 months when I was out of work and using my home desktop as my main computer, but now that I'm back at work it only sees light use during the evenings after I get home from work. Also, I only occasionally use the keyboard for gaming so it doesn't get heavy use in that department either. Depending on how you would use the keyboard, your mileage may vary but I've been impressed with the keyboard so far (although the novelty of the backlight has warn off and I never use the backlight anymore). I will also note that it looks like XArmor is now selling a cheaper version of the keyboard without the backlight so if you don't think you'll ever need the backlight, the cheaper version may be the way to go.
Note: I decided not to include all 50+ pictures in the main body of this review (I only included 20), but I did create a public web album with higher resolution versions of all the pictures I took.
Background
I had been needing to replace my flaky wireless keyboard for more than six months, and I'm actually glad I put off buying a replacement until last week. If I had not waited, I wouldn't have the keyboard I do now...the XArmor U9BL. That is because the XArmor U9BL, made by iOne, only just started selling at the end of July and it was pure coincidence that this keyboard was released around the same time I started searching for a new one.
I had been reading review after review of Microsoft and Logitech keyboards and just wasn't seeing anything that was feature-full, well built,
and reliable. Complaints about those keyboards included things like the lettering on the keys wearing off quickly (which can be common), certain keys not working after a few months, and even specific key combinations not working within games. There are always going to be negative reviews of products on the internet, but my general sense was that keyboards are not being made like they use to be. You know the saying...you get what you pay for.
My frustration with the quality of keyboards eventually led me to some interesting forums discussing the virtues of mechanical switch keyboards. I was not a stranger to mechanical switch keyboards, but I had not used one for quite a few years (the last one being a classic IBM Model M keyboard that I grew up using). I had been using rubber-dome keyboards for so long that I guess I had assumed these "vintage" style keyboards didn't really exist anymore. If you're wondering what a mechanical switch keyboard is and how it differs from rubber-dome keyboards, here are a few links that will explain the differences and the types of mechanical switches available (Cherry MX, buckling spring, Alps, etc).
Also, to save you some time researching these types of keyboards, here are some of the more popular ones with normal key layouts that have been on the market for a while (in no particular order):
There are other cheaper ones available but most reviews indicate that they suffer in the quality department. Mechanical keyboards also come in other layouts and form factors like the
tenkeyless design. I use the number keypad all the time, so I don't even consider the smaller form factors.
The keyboards above are in the $125 and higher range. Most people may not be able to justify the cost of these keyboards, but it is a shame that a device we use every day to interface with our computers is often cheaply made and provides a horrible typing experience. For this and other reasons, I decided to splurge and get the XArmor U9BL.
Review
 |
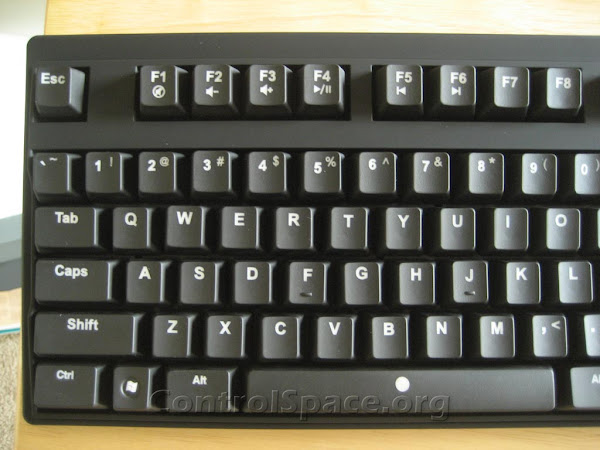
| A nice view of the clean-edged lettering on the laser-etched keys. |
Features
The XArmor keyboard has an impressive list of features:
- Cherry MX blue mechanical key switches (rated for 50 million keystrokes)
- N-Key Rollover - I haven't mentioned this yet, but you can reference this post for more information on this feature.
- Blue LED Illumination (one LED underneath each key) with 8 levels of brightness
- Media keys (up and down volume level, mute, next/previous track)
- Integrated two port USB 2.0 high speed hub
- Audio
- Headphone jack
- Microphone jack
This is the only keyboard currently available with all of these features. Out of all the available mechanical keyboards, there are only two backlit ones that I know of:
For me, backlighting wasn't a necessity, but there were a few occasions with my old keyboard where I would have liked this feature. The Deck Legend is the more sturdy keyboard weight-wise, but the XArmor includes additional features I knew I would use (built-in USB hub, media keys, audio/mic pass-thru, etc).
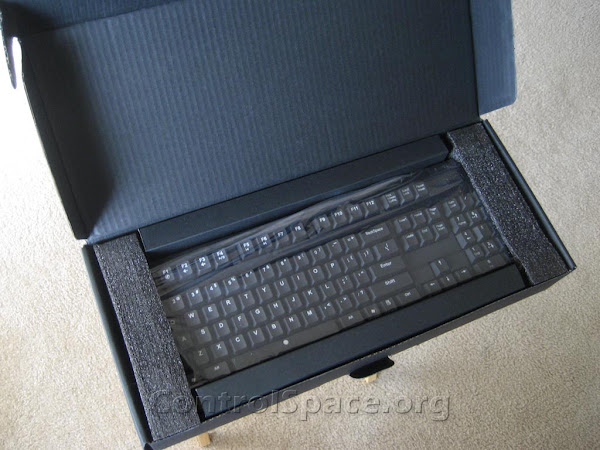
Packaging / Contents
The XArmor keyboard comes in fairly standard packaging. No complaints here.
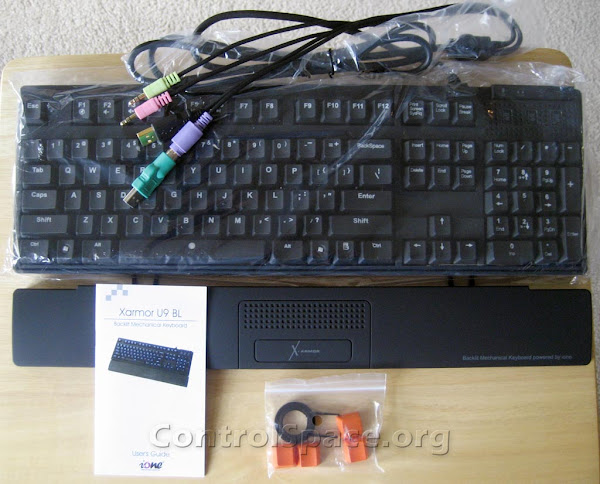
In the packaging, you will find these items in addition to the keyboard:
- Wrist Rest
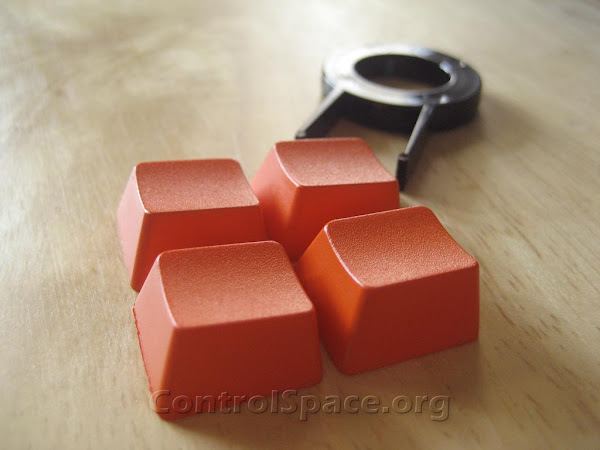
- Extra Keys, plus a key puller
- PS/2-to-USB converter (pre-attached)
- Manual - The front cover shows that the escape key has a red LED, but it doesn't. I would have actually liked that.
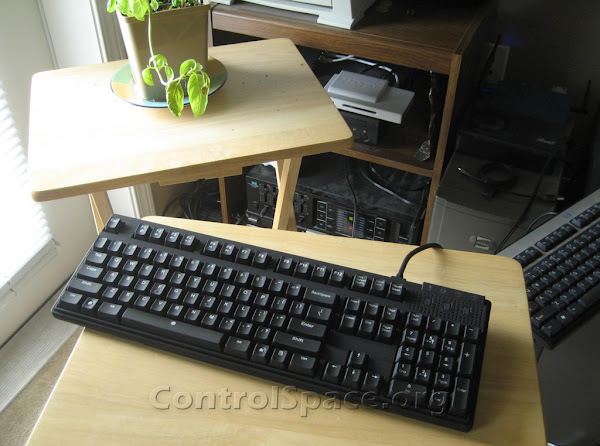
This keyboard looked good from the pictures I saw, and it looks just as good in person. It has a nice clean standard layout and it has a rubber coating that gives it a nice soft, diffuse look.
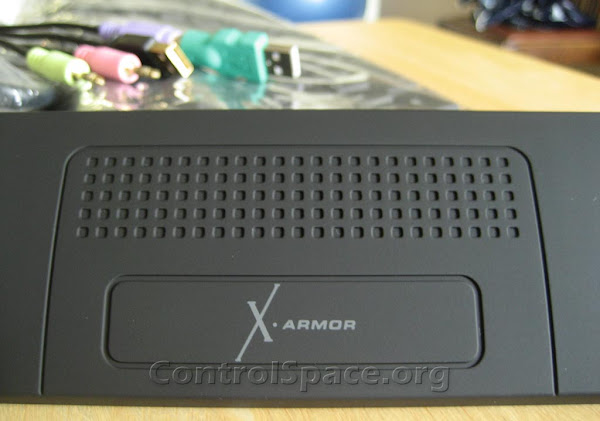
Here are some closeups of the wrist rest...
Here are the audio/mic and USB cables...some of which are pointlessly plated in gold. The ps2-to-usb adapter comes already attached.
Last of all, here are the extra key caps and the key puller that were included with the keyboard.
Construction and Quality
Internals
I haven't taken apart my keyboard yet (other than removing a few keys), so I'll refer you to the XArmor trial run
sample review for pictures of the keyboard's internals (soldering, components, etc). They have some great pictures that help give an idea of the internal build quality.
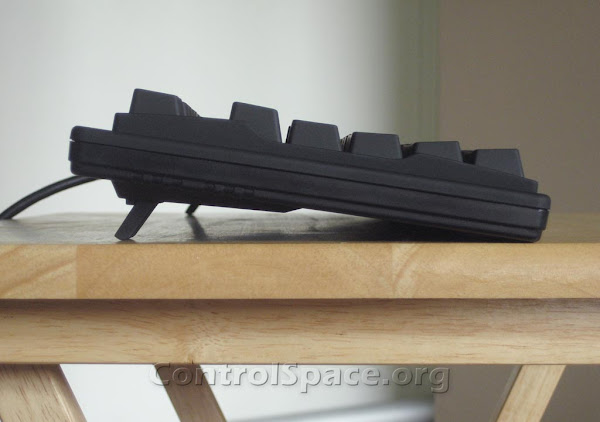
Weight
One thing I noticed when removing the keyboard from the packaging was the solid feel. The keyboard weighs in at slightly over 2.8 pounds, which isn't as beefy as a Deck Legend (3.5 lbs.) or Model M (5-6 lbs.) but it is better than the average keyboard. My old wireless keyboard which was larger than the XArmor weighs less at 2.1 pounds. While weight shouldn't be the sole factor in determining build quality, the weight of this keyboard did give me the impression that this was a solidly built keyboard.
Rubber Coating
There seems to be a trend with gaming keyboards (I'm thinking Razer Lycosa and other keyboards) to use rubber-coated keys. In the case of the XArmor, pretty much everything is rubber coated except the bottom of the keyboard. You'll find it on the top and side surfaces of the keyboard, the keys, and the wrist rest. There is a definite tactile difference between the feeling of the coating on the keys and the rest of the keyboard. The wrist rest and other surfaces of the keyboard have a nice soft/smooth feel to them, while the coating on the keys has a slightly rougher/harder feel giving an impression of greater durability.
The long-term durability of the rubber coating concerns me a little bit, but that is only a concern that can eased over time if the keyboard holds up well. I've seen several people complain about the rubber coating peeling off the keys on the Razer Lycosa, but that keyboard may use a completely different type of coating and/or process for applying it (which is the impression I get after looking at pictures). I don't want to give anybody the impression that the coating
will peel, but it was a concern I had before buying the keyboard. It is less of a concern now that I've had a chance to see the keyboard and type on it for a few days. And if it does turn out to be a problem, hopefully it would be covered under the one year warranty period.
I thought it would be interesting to share some information I received from XArmor USA regarding the manufacturing of the keys. Here are two email excerpts from my communications with them before I purchased the keyboard:
"The keycap on XArmor U9BL is molded with translucent material and then coated with soft black rubber coating and finally with laser etched on the characters. Very similar to what they do on most cellular phone."
"I've missed one thing, the key cap has a final clear UV coating on them, so it will prevent the key characters from wearing out."
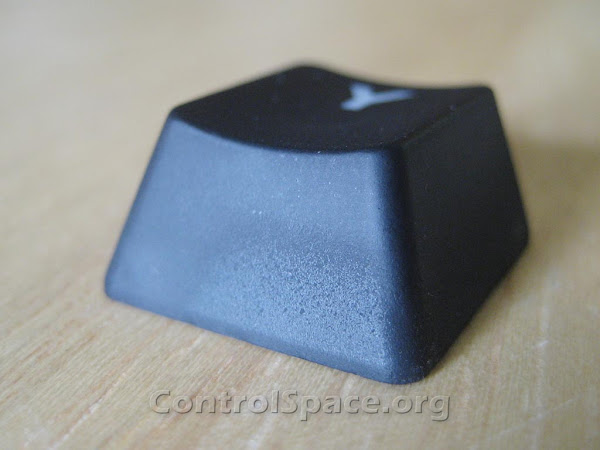
The only other thing I want to touch on in terms of the coating (which is going to be a little nit-picky) is the slightly uneven application of it on some of the keys. The picture below shows one of these keys. The unevenness only ever occurs on the bottom half of the key, not the top, so it is barely noticeable when the keys are on the keyboard.
While I'm on the subject of key caps, here is another picture of the key cap viewed from the bottom which shows the translucent plastic:
Overall, the rubber coated keys feel and look nice but I imagine most people willing to fork out money for a mechanical keyboard would consider durability a higher priority. Even though the keyboard is rated for 50 million key strokes, you don't want the keys to be the lowest common denominator (again, this is just an assumption since the durability of these keys hasn't been proven yet). It would be great to see a version of this keyboard with dual injection molded keys (or dye-sublimation) and know that the key caps would last as long as the rest of the keyboard.
Typing
Mechanical Key Switches
One of the main draws for this keyboard are the Cherry MX mechanical switches used for the keys (as seen in the picture below). They have a great reputation and they provide a very satisfying typing experience compared to rubber-dome keyboards. These switches come in various colors; each color varies in terms of tactile feel (linear vs non-linear force required to press the key) and noise (i.e. clicky vs non-clicky). This particular keyboard uses Cherry MX blue switches which provide a nice "clicky", tactile feel for everyday typing. I like the clicky noise, but keep in mind that it is loud enough to where it could be an annoyance for other people that work around you.
The blue switches were an interesting choice considering the keyboard is marketed as a gaming keyboard, because it is generally agreed among enthusiasts that Cherry MX brown or Cherry MX black switches are better for gaming (refer to the links at the beginning of this article for more detailed information on the difference between the colors). With that said, I am perfectly happy with the blue switches, but I'm not a heavy gamer. I hope XArmor continues to sell this keyboard with blue switches, but I do think they should provide this keyboard with at least one other switch color to appeal to a wider audience. In fact, XArmor is currently running a
poll on their site to find out which switch people are most interested in if you'd like to vote and give your input.
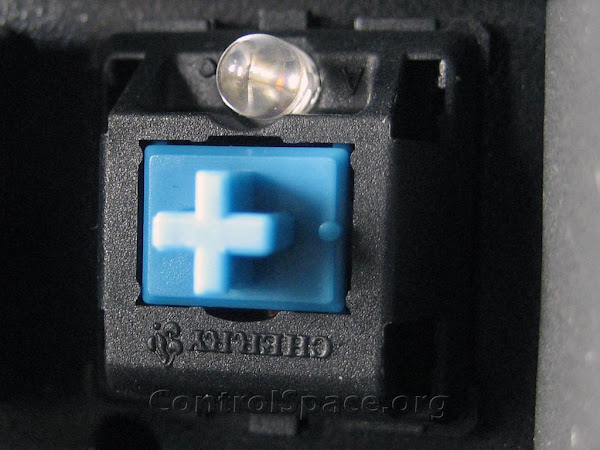 |
| Cherry MX Blue Mechanical Switch |
Making the Switch
During my first ten minutes of using this keyboard, the thought that kept running through my mind was that it could take some time to get used to it. For example, one of the first things I noticed was that both Shift keys and the Backspace key felt much stiffer than the other keys. I'm not sure what is different about these keys, but they definitely require more force to depress and it was ruining my typing rhythm. However, now that I've been using the keyboard for five days or so, I think my fingers have adjusted because I don't really even notice the difference anymore.
Even though switching to the new keyboard felt different at first, I can't say that it immediately felt better than my older rubber-dome keyboard that I had been using for so long. However, I recently tried typing on the old keyboard again and the new keyboard felt dramatically better in comparison. It reminds me of the switch from VHS to DVD. I didn't feel like there was a
huge difference in quality moving to DVD, but after watching DVDs for a while it was really hard to go back to the lower quality of VHS tapes.
Touch Typing
Touch typists will enjoy the well placed and nicely raised ridges on the 'F' and 'J' keys on the home row.
Testing Switch Quality and N-Key Rollover
I ran through two tests on my keyboard to make sure nothing was defective:
- N-Key Rollover Test - I tested the n-key rollover functionality with both USB and PS/2 connections. Everything worked as expected.
- Key Chattering/Bouncing - Key "chattering" with mechanical switches is when one key press registers as multiple key presses. This usually only occurs if a switch is defective. There are simple tests that can reveal chattering and I didn't find anything wrong with the mechanical switches on my keyboard.
Media Keys
The media keys are located on the function keys (F1-F6) and they are activated by holding down the left Shift key then pressing the desired media key. The media keys work fine in Windows, but I do have a minor complaint with how they were implemented. Because the media keys require holding down the Shift key, the operating system sees a key combination like 'Shift+VolumeUp' instead of just 'VolumeUp'. Again, this works fine in Windows but it did cause problems with my media key shortcuts in Linux. I would have much rather seen dedicated media keys or at least media keys activated by a dedicated function (Fn) key, not the Shift key. If a function (Fn) key had been used instead, the only key stroke seen by the operating system would be 'VolumeUp'. I haven't run into any other problems yet, but this could also cause problems with shortcuts in Excel, Photoshop, or other software applications that use shortcut combinations with the Shift key and any of the first six function keys (F1-F6). Again, this is because the operating system would see something like 'Shift+VolumeUp' instead of 'Shift+F3' if a shortcut like that was used. I should note that this would only happen when using the left Shift key; the right Shift key behaves normally and doesn't activate the media key functionality.
 |
| The media keys are located on the function keys (F1-F6). |
For future XArmor products, it would be nice to see the media key functionality improved. Here are some ideas:
- Replace either the right Windows key or the Menu key right next to it with a function (Fn) key. Or make the spacebar shorter and add a fourth key to the left of the spacebar like they do on laptops.
- Another idea would be to replace the num lock, caps lock, and scroll lock on the upper right of the keyboard with four dedicated mechanical switch media keys (mute, volume up, volume down, and play/pause). To deal with the missing status LEDs, they could turn the keys themselves into status lights since they are backlit. For example, the Caps Lock could change from blue to green if it is activated. Same goes for num lock and scroll lock. Or they could just put smaller status LEDs somewhere else on the keyboard.
- Even better, and along the same lines of the previous idea. Replace the large status LEDs with a volume knob and 3 mechanical switch keys (play/pause, next track, previous track). Turning the volume knob would control volume up/down and then it could be made so that pressing down on the volume knob mutes the audio. That would give dedicated controls for all six of the current media functions by using 1 knob and 3 keys. Again, the status LEDs could be integrated into to the caps lock, num lock, and scroll lock keys.
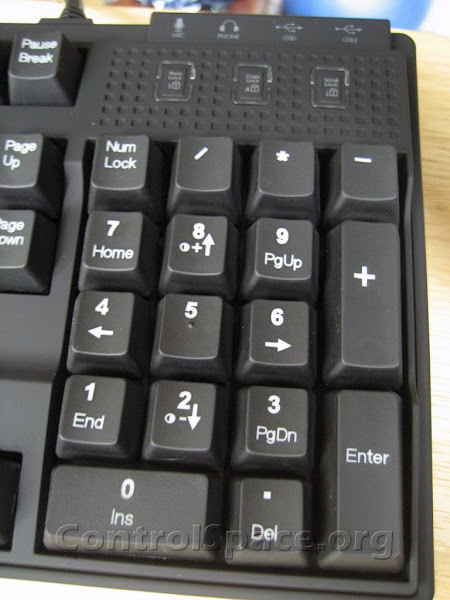 |
You can see there are plenty of room above the number keypad for 4 extra keys
(or 1 knob and 3 keys) if they decided to add dedicated media keys. |
Anyhow, I thought I would throw those ideas out there in case anybody from XArmor reads this post. I don't know what the perfect solution would be without adding too many more keys and bulk to the keyboard (I like the compact nature/design of the keyboard), but it would be nice if there was an improvement with the media keys. I just hope they don't remove the media keys altogether like Das did with their keyboards.
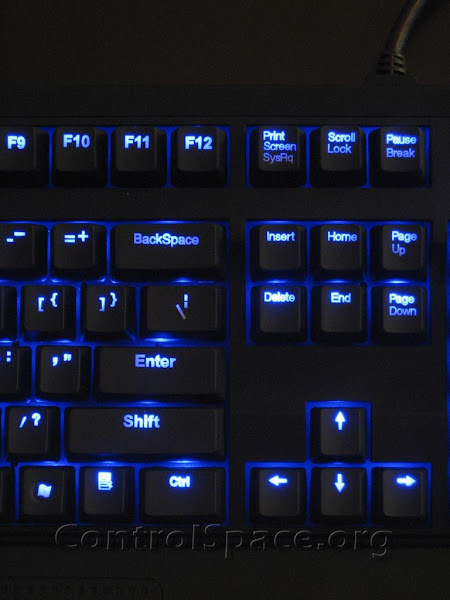
Backlight / Illumination
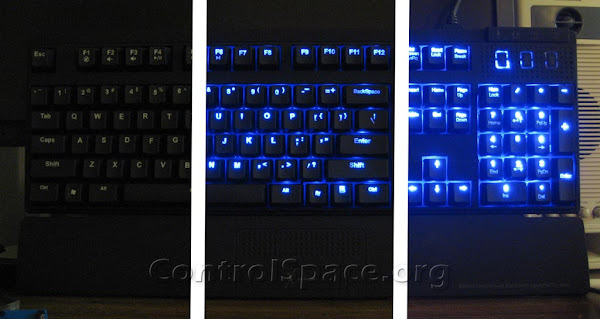
The XArmor keyboard is illuminated by blue LEDs located under every key. The keyboard doesn't feature multi-colored programmable LEDs like other keyboards but the illumination does have 8 levels of brightness control. The brightness is controlled by holding down the left Ctrl key in combination with either the up or down arrow on the number keypad. The following picture is a composite of 3 pictures taken at night. From left to right, the illumination is turned off, then set to level 1, then set to level 8. The highest brightness level doesn't have the street lamp glow look in person (I blame my camera), but the highest level is quite bright at night.
Here is another similar composite image taken during the day at the same brightness levels. It is hard to tell from the photo, but the level 1 brightness is still sufficient for daytime use.
As you can see, the highest brightness level shouldn't leave anybody wanting a higher setting. I found that level 1 or 2 brightness was the most comfortable for me. Anything brighter than that felt too distracting in my peripheral vision when I was focused on the computer monitor. Another thing to note is that there isn't much difference between levels 6 and 8. They are almost exactly the same.
Overall, I'm happy with the backlighting, but I'll point out a few minor things that could bug some people. First, the larger keys aren't very evenly lit. As you can see in the picture below, they are much brighter towards the center of the key where the LEDs are located. Second, only the top half of the keys are generally lit well (which only affects a couple of keys). Again, the top half of the key is where the LEDs are located. The Print Screen key is a great example of this; SysRq hardly looks like it is lit up in person. These minor issues also explain why they printed/etched the dual character keys the way they did. Take the apostrophe/quote key for example. Most keyboards stack these character vertically on top of each other, whereas XArmor places them differently and makes one character the super-script of the other character.
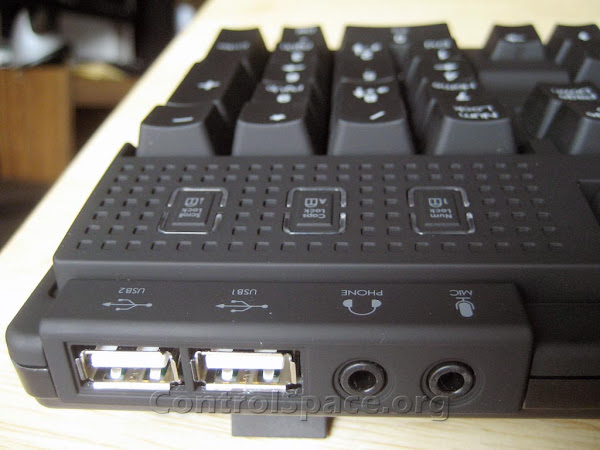
USB Hub and Audio
Both the integrated USB hub and audio pass-thru jacks work as expected:
- Integrated USB Hub - So far, I've tested the USB ports with USB mass storage devices and the Xbox Live Vision camera.
- Audio Pass-thru - I like the pass-thru design much better than keyboards that have built-in USB soundcards, like one of the Logitech gaming keyboards...yuck.
I have the audio hooked up so I can use either my speakers or my headphones which are plugged into keyboard. In order to accomplish this, I just used a short cable to split the audio output on the back of my computer. My speakers get plugged into one side and the audio pass-thru cable from the keyboard gets plugged into the other side. Both my speakers and my headphones get the audio signal simultaneously so I don't have to move cables around when choosing one output option over the other.
Conclusions
I mentioned at the beginning of the review that I was looking for a keyboard that was feature-full, well built,
and reliable. As far as features, there isn't another keyboard that can boast every single feature this keyboard has (mechanical switches, LED illumination, integrated usb, audio pass-thru, media keys). As far as being well built, this is a solidly built keyboard with only minor issues (e.g. uneven application of rubber coating on keys, etc). As far as being reliable...I guess only time will tell. This is not a perfect keyboard and it might not meet everyone's requirements, but my typing fingers are thanking me for finally upgrading and making the leap to a mechanical keyboard. It is the first XArmor branded product to be released in the U.S. and I look forward to seeing other products from the company in the future.
Pros
- Cherry MX blue mechanical key switches
- Nice compact design while retaining the standard keyboard layout
- Good overall build quality
- Integrated USB hub
- Audio pass-thru instead of integrated sound card like some other gaming keyboards
- Bright LED illumination with 8 levels of brightness
- A pleasure to use for typing
Cons (some of them are nit-picky)
- Media key implementation could be improved
- Uneven spray pattern on the bottom half of some of the keys
- Evenness of backlighting could be improved
- No dual injection molded keys (or dye-sublimation)
- Maybe the durability of the rubber coated keys? (this is yet to be determined)
- Street Price ($150) - although you won't find many mechanical switch keyboards with n-key rollover much cheaper.
Search Google for more XArmor information
Places to buy this keyboard:
Other reviews for this product:
More Pictures
One last thing. In this review, I didn't include all 50+ pictures that I took so follow the slideshow below if you want to see all of them. They're all higher resolution versions (1024px) of the pictures in this review.


