Last Updated 8/23/2015 (adds mention of Windows 8 & 10 support)
There are various instructions around the internet that describe how to get Nikon Scan working on a 64-bit system. My instructions are slightly different and use only modified installation files from Nikon (nothing from Vuescan is used). Before I list the instructions, this will only work with and has only been tested with the following devices and operating systems:
- Devices
- Nikon Coolscan IV ED
- Nikon Coolscan V ED
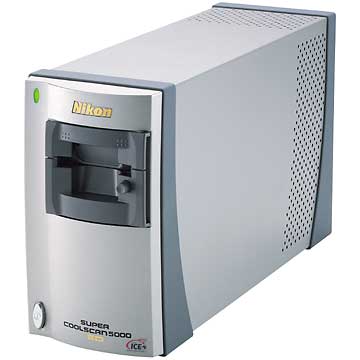
- Nikon Super Coolscan 5000 ED
- 64-bit versions of Windows Vista, Windows 7, Windows 8, and Windows 10
Here are the instructions to get this setup working:
- The driver included with Nikon Scan is an older 'unsigned' driver. Newer versions of Windows will only allow you to install 'signed' drivers but there is an option to enable installation of 'unsigned' drivers. Before you can install the Nikon scanner driver as detailed in the next steps, you will need to look for instructions specific to your operating system version for how to enable installation of 'unsigned' drivers. After you have done this, proceed to the next step.
- Install Nikon Scan 4.0.3 Vista 32-bit software. This was the last version of Nikon Scan that Nikon released before they ended support for the software. Windows will probably want to reboot after this step.
- At this point the scanner will not work so you will have to update the driver for the scanner with a modified version of Nikon's Setup Information File (.INF file) that works on 64-bit systems. Create the file 'NikonUSBScanner.inf' with the contents shown below and save it somewhere like C:\Temp\Nikon (or just download NikonUSBScanner.inf):
; NikonUSBScanner.INF  -- Windows Still Image Setup File of

;                Nikon USB Scanners for Windows Vista/7/8/10 64-bit

; Manufacturer: Original by Nikon, Modifications for 64-bit by Chris Rawlings


[Version]

Signature="$CHICAGO$"

Class=Image

ClassGUID={6bdd1fc6-810f-11d0-bec7-08002be2092f}

Provider=%ProviderStr%

DriverVer=08/22/2009,1.0


;[ControlFlags]

;ExcludeFromSelect=*


[Manufacturer]

%Mfg%=DeviceModels,ntamd64


[DeviceModels.ntamd64]

%DeviceDescLS0040%=USBScanner,USB\VID_04B0&PID_4000

%DeviceDescLS0050%=USBScanner,USB\VID_04B0&PID_4001

%DeviceDescLS5000%=USBScanner,USB\VID_04B0&PID_4002


;///// USBSCANInstallSection /////

;**  Windows Vista/7/8/10 section **

[USBScanner.ntamd64]

Include=sti.inf

Needs=STI.USBSection

SubClass=StillImage

DeviceType=1

DeviceSubType=0x4000

Capabilities=0

AddReg=NKUSBSCN.AddReg

CopyFiles=NKUSBSCN.CopyUSDFiles


[USBScanner.ntamd64.Services]

Include=sti.inf

Needs=STI.USBSection.Services


[NKUSBSCN.AddReg]

HKR,,HardwareConfig,1,4

HKR,,DevLoader,,*NTKERN

HKR,,NTMPDriver,,usbscan.sys

HKR,DeviceData,ICMProfile,1,0,0

HKR,,USDClass,,"{07C71AC0-FA90-11d3-B409-00C04F87578E}"

HKCR,CLSID\{07C71AC0-FA90-11d3-B409-00C04F87578E},,,"Nikon STI USD"

HKCR,CLSID\{07C71AC0-FA90-11d3-B409-00C04F87578E}\InProcServer32,,,%11%\NKSCNUSD.dll

HKCR,CLSID\{07C71AC0-FA90-11d3-B409-00C04F87578E}\InProcServer32,ThreadingModel,,"Both"


[SourceDisksNames]

1=%DiskName%,,


[SourceDisksFiles]

NKSCNUSD.dll=1


[DestinationDirs]

NKUSBSCN.CopyUSDFiles=11

;NKUSBSCN.CopyUSBFiles=10,system32\drivers


[NKUSBSCN.CopyUSDFiles]

NKSCNUSD.dll,,,32


;[NKUSBSCN.CopyUSBFiles]

;usbscan.sys,,,32


[Strings]

ProviderStr="rawc@live.com"

Mfg="Chris Rawlings"

DiskName="Nikon Scan 4 CD-ROM"

DeviceDescLS0040="Nikon COOLSCAN IV ED"

DeviceDescLS0050="Nikon COOLSCAN V ED"

DeviceDescLS5000="Nikon SUPER COOLSCAN 5000 ED"
- In the same place you saved the custom INF file, you will also need the file 'NKScnUSD.dll'. This file can be found in C:\Program Files (x86)\Common Files\Nikon\Driver\ScanUSB, so just copy if from there into C:\Temp\Nikon. This file was installed to your system when you installed Nikon Scan 4.0.3.
- Install the modified driver files for your slide scanner:
- Now that both installation files are in place in C:\Temp\Nikon, turn the scanner on and navigate to the device in the device manager (right click 'Computer' in the start menu or on the desktop --> Manage --> Device Manager).
- Right-click on the scanner device and choose 'Update Driver Software'.
- Next, choose 'Browse my computer for driver software' and browse to C:\Temp\Nikon where you saved the driver installation files.
- Give Windows permission to install the driver and you should be all set to start scanning with Nikon Scan on your 64-bit Windows system.